

This guide will show you how to integrate with the Stripe payment gateway/merchant processor for accepting credit card payments on your OptimizePress OptimizeCheckouts forms
Please note: In order to use Stripe in LIVE mode, you will need to ensure your site has a valid and active SSL certificate. If you need help with this, please contact your hosting company. Most hosting providers now include a free SSL certificate option if you do not have specific requirements.
You'll also need a Stripe account to complete the integration process.
Stripe Test & Live Modes
The first step in using Stripe is to connect OptimizeCheckouts to Stripe in test and live modes. This allows you to effectively test your checkout processes before going live with your products. We recommend testing all products in test mode (to ensure emails and any logins are delivered) before activating the product in live mode.
We recommend connecting Stripe Test mode first (don't worry you can have both modes connected at the same time). The process is pretty much the same for Test mode and Live mode...
If you already connected Stripe Test mode, click here to learn how to connect Stripe Live Mode
Connect Stripe TEST Mode (Sandbox)
Stripe recently changed how test mode works, and the recommended method now is to use what is called a Sandbox account. Before proceeding, you'll want to create a Stripe Sandbox account.
To create the Sandbox account, you will need to login to Stripe.com and click on your business name in the top left of your screen. From the dropdown, select "Switch to sandbox" and then click "Create sandbox" if you don't already have one. If you already have a sandbox account for stripe, then you may use that, however, for best results, we suggest setting up a new sandbox account if you already have other integrations running - this allows you to test while not having anything else on that sandbox account.

Once you have the sandbox account, you can proceed with connecting your Stripe Sandbox account to OptimizeCheckouts.
To connect to the Stripe Sandbox, navigate to " Checkouts > Settings > Payment Gateways" and you'll see Stripe there. Hover your mouse over Stripe and click the green "Connect Stripe" button.
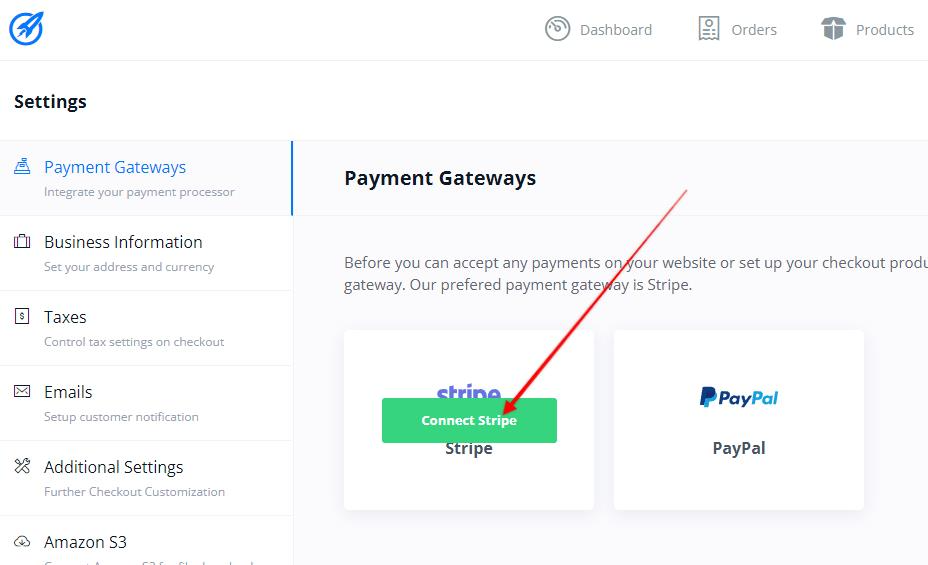
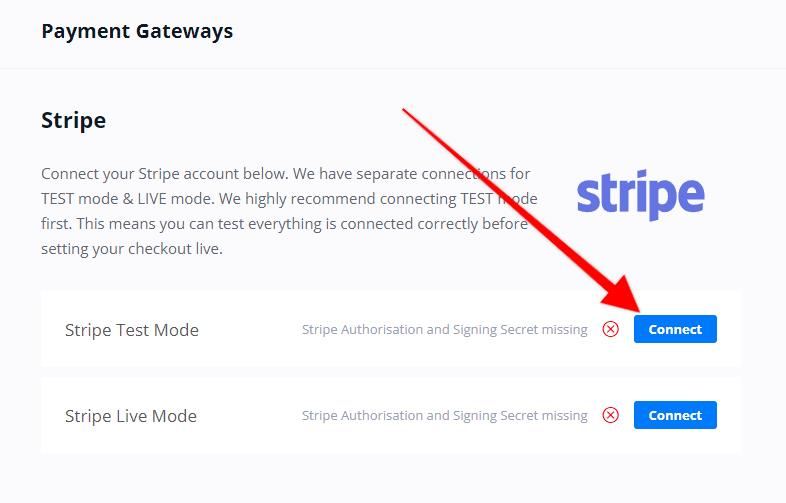
Now you'll see the options to connect either in Test mode, or Live mode.
Click the blue " Connect" button to the right of "Stripe Test Mode" (Sandbox)
Now click the " Connect Stripe in Test Mode" button

Once you login to Stripe on the next screen, you'll see the option to choose the account you want to connect to. You must choose your Stripe Sandbox account.

Once you connect, you'll be brought back to your OptimizePress Checkouts screen.
You'll now need to ensure that your Checkouts Test Webhook is added inside your Stripe account.
- Setting Stripe Test Webhooks
To use OptimizePress with Stripe, you must add webhooks inside your Stripe account for TEST (sandbox) and LIVE mode connections. We'll show you how to setup the test webhooks first:
Webhooks will enable secure communication between OptimizeCheckouts and Stripe. Follow the steps below to connect Stripe and OptimizeCheckouts.
Now you'll need to go login to your Stripe Sandbox account. To do this, just login to your main Stripe account, navigate to the top left and click your business name, and then click "Switch to Sandbox" and choose the correct sandbox account.

Then click on " Developers" in the bottom left of the Stipe dashboard, and select "Webhooks" from the menu: 

The new way to add a destination in Stripe is to choose the Events first, instead of after pasting the URL. It is EXTREMELY IMPORTNAT that you add ONLY the events that we provide (listed below), as adding additional events will cause errors. You can search for and tick the checkbox next to the events that are needed. Do NOT click "Continue" until after all the events are added correctly

- Test Webhook Events
The following events are needed. Please ensure that you do not add additional events.
- charge.refunded
- customer.subscription.created
- customer.subscription.updated
- customer.subscription.deleted
- invoice.payment_failed
- invoice.payment_succeeded
- subscription_schedule.canceled
- subscription_schedule.completed
- customer.source.updated
- customer.source.expiring
- customer.source.deleted
- customer.source.created
- payment_method.updated
- payment_method.detached
- payment_method.automatically_updated
- (or) payment_method.card_automatically_updated (note that this event can be different depending on when your account was established)
- payment_method.attached
- customer.tax_id.created
- customer.tax_id.deleted
- customer.tax_id.updated
Once you have added these events, click "Continue"

Now, choose "Webhook endpoint" and click "Continue" again.

Now, you'll get the Webhook URL from the OptimizePress Checkouts plugin Stripe test mode (Checkouts > Settings > Payment Gateways) - click "edit" next to Stripe Test Mode, and you'll see the webhook URL. Copy this URL and we'll be pasting it back in Stripe: 

If everything is correct, click the "Create destination" and then follow the steps below on how to get the Signing Secret key.
- Where to get the Test Signing Secret Key
If you just set up the webhook, you can grab it on the next screen after you clicked "Create destination" (see steps above).

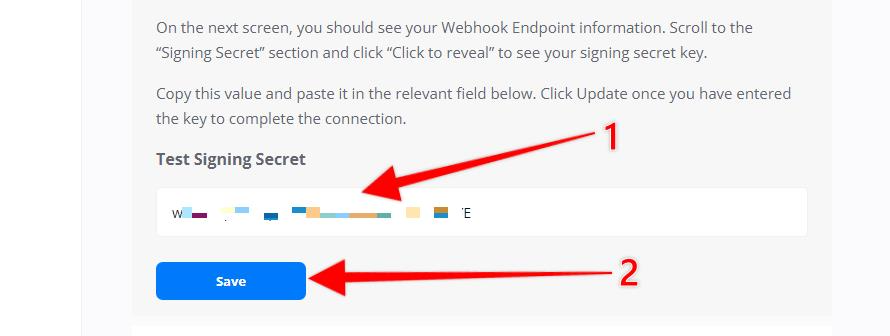
Now go back to the stripe settings in OptimizeCheckouts and paste the Signing Secret into the "Test Signing Secret" field (you should already be on that page after you connected the Stripe account in test mode earlier in this guide). If you are not on that page, just go to " checkouts > settings > payment gateways" and click on stripe, and edit the test mode.
After you enter the Test Signing Secret, click on " Save"
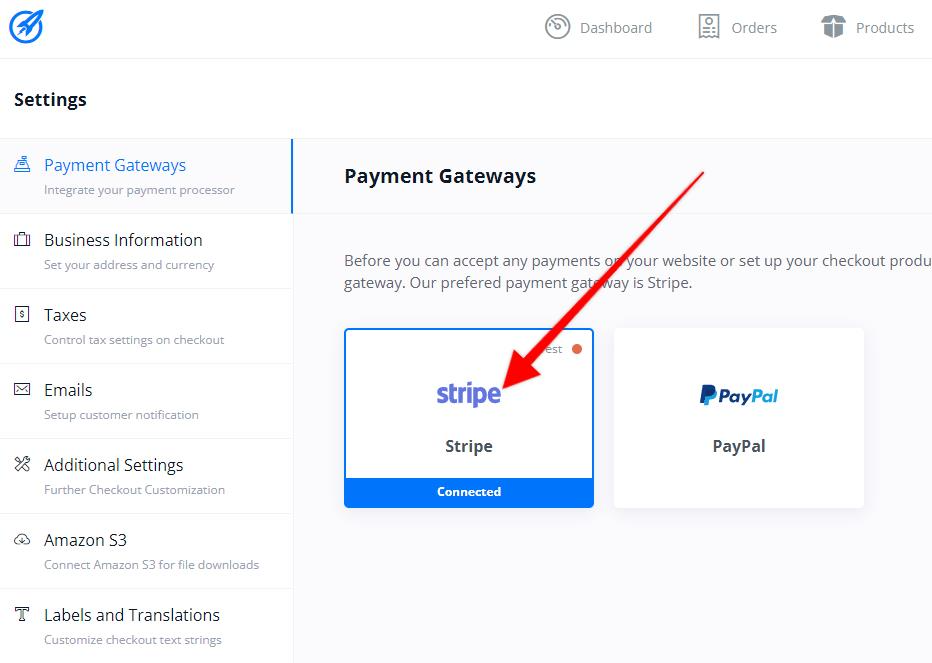
Now you should see the "Test Mode Connected" with a green checkmark icon - this indicates that you are connected to Stripe Test Mode and have successfully connected the Test webhook signing secret.

See our Making Test Purchases documentation when you're ready.
Connect Stripe LIVE Mode
Connecting Stripe in live mode follows the same steps as the Test Mode, with the only difference being that you would setup the webhook in live mode on your live account instead of the Stripe Sandbox.
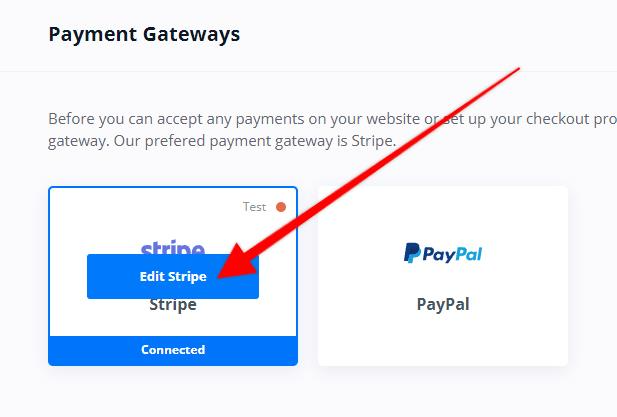
To connect Stripe in Live Mode, navigate on your site to " Checkouts > Settings > Payment gateways" and you'll see Stripe there
As you should already have the Test mode enabled, click on " Edit Stripe" when you move your mouse pointer over the Stripe logo
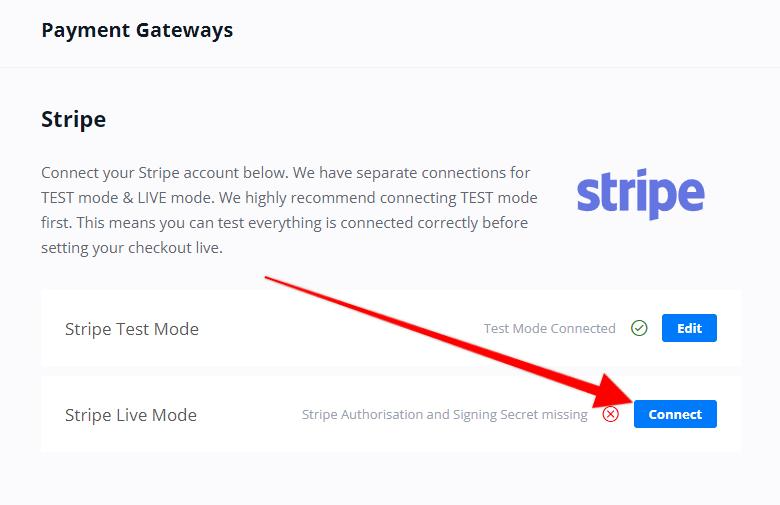
Click the blue " Connect" button
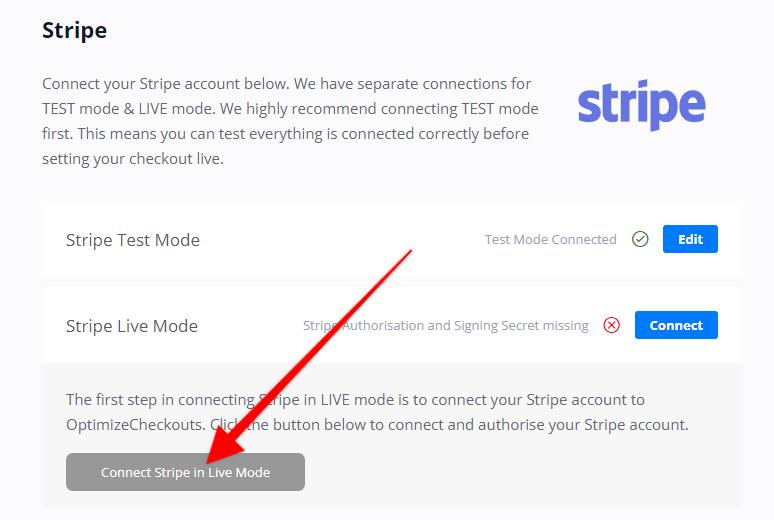
Then click the " Connect Stripe in Live Mode" Button
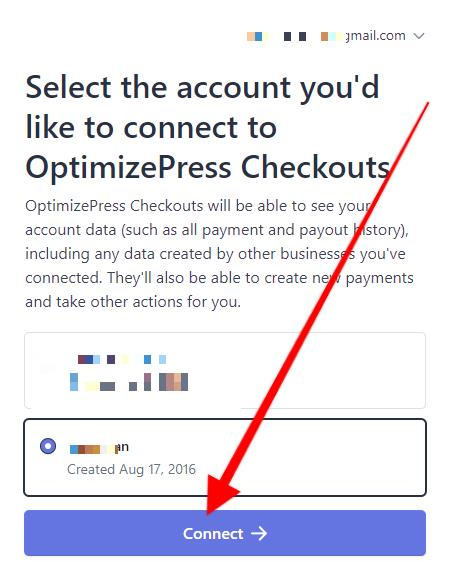
On the next screen you'll be taken to Stripe.com to connect your Stripe account. You will need to login to Stripe and then select the account you want to integrate with (if you have more than 1 account). If you have one account for Stripe then it will automatically be selected for you. Click the blue " Connect" button on that screen.
You'll now be taken back to your OptimizePress dashboard after a quick minute or so. The next step will be to setup the Live Webhook.
- Setup Stripe Live Webhook
Login to your LIVE Stripe account that you want to use for taking payments.
Click "Developers" and "Webhooks" at the bottom left of the screen.


- Stripe Live Webhook Events
These are the events that are needed. While selecting additional events are not necessary, you can have more if you want - though OptimizePress will not use them.
- charge.refunded
- customer.subscription.created
- customer.subscription.updated
- customer.subscription.deleted
- invoice.payment_failed
- invoice.payment_succeeded
- subscription_schedule.canceled
- subscription_schedule.completed
- customer.source.updated
- customer.source.expiring
- customer.source.deleted
- customer.source.created
- payment_method.updated
- payment_method.detached
- payment_method.automatically_updated
- (or) payment_method.card_automatically_updated (note that this event can be different depending on when your account was established)
- payment_method.attached
- customer.tax_id.created
- customer.tax_id.deleted
- customer.tax_id.updated
Once you have all of these events added, click "Continue"

Now, choose "Webhook endpoint" and click "Continue" again.

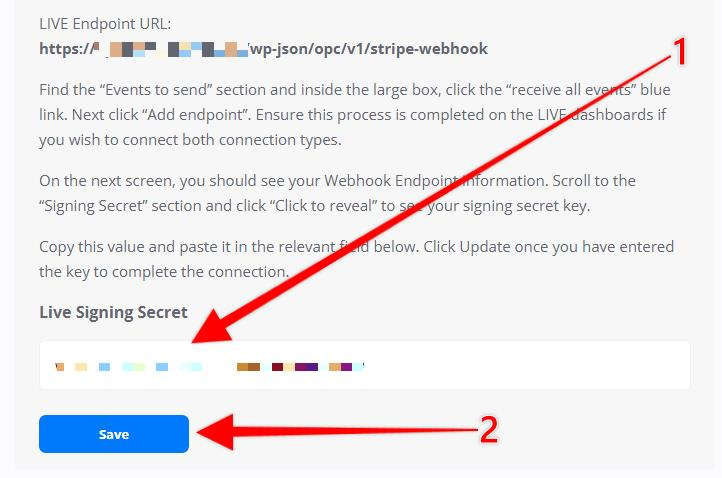
Now, you'll get the Webhook URL from the OptimizePress Checkouts plugin Stripe Live mode (Checkouts > Settings > Payment Gateways) - click "edit" next to Stripe Live Mode, and you'll see the webhook URL. Copy this URL and we'll be pasting it back in Stripe:

Now you'll just paste the webhook here in the Stripe webhook URL field. You can also give this a name and description if you like. Then just click the "Create Destination" button.

You'll now need the Stripe Live Signing Secret key.
- Stripe Live Signing Secret
Now just copy the Signing Secret and go back to your Stripe Live Settings in Checkouts (you didn't close that tab did you?). If you closed it, just go to " Checkouts > Settings > Payment Gateways" and click on Stripe and then "edit" next to Stripe Live Mode.

Paste in the Signing Secret here and click the blue " Save" button
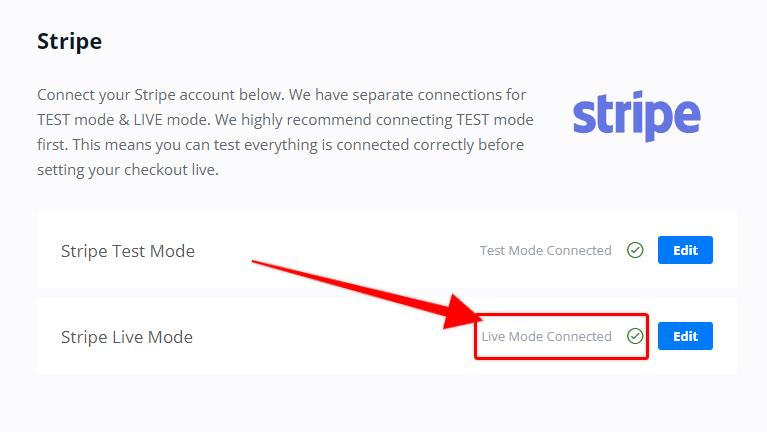
Once it saves, just refresh your screen and you should see next to "Stripe Live Mode" the " Live Mode Connected" text with the green checkmark. This means that you have successfully connected Stripe in Live Mode (Confetti now falls from the sky...)
- Set Your Product to Live
Now that you connected Stripe Live Mode, don't forget to set your products to live.
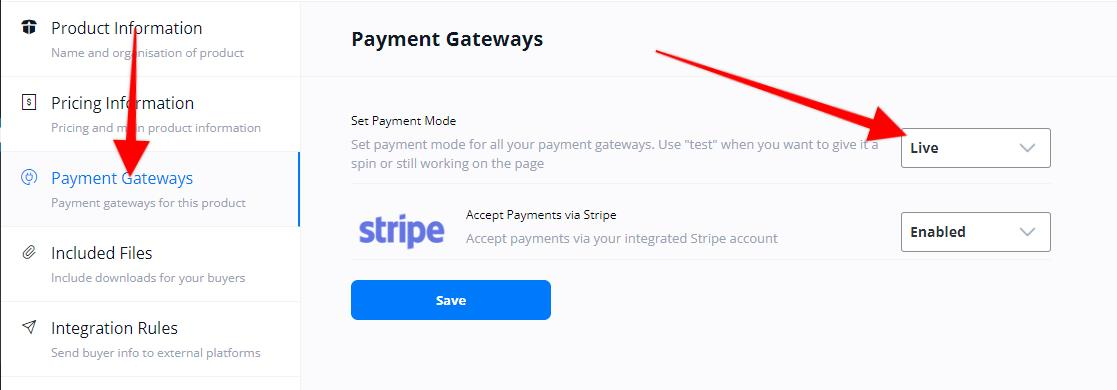
Go to " Checkouts > Products" and click "edit" next to the product you want to set live
Go to " Payment Gateways" and set the payment mode to "Live" and click the blue "Save" button
On the products screen you should now see your product live. Make sure to change all your products to live if there are multiple products in your funnel. This would include any bump offer, as well as your upsell and downsell products.
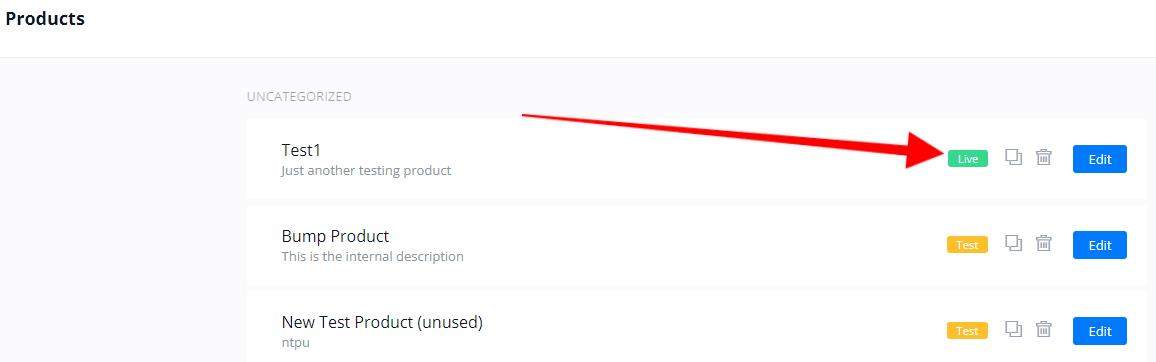
You can also use a live card and go through the checkout to ensure that everything works and that you didn't forget to set a product to "live" (you can lower the price if you need to and then change it back).
Frequently Asked Questions
How do I access the old Test Mode webhooks?
You can still access the old test webhooks by logging into the account you created them under. Click the account name in the top left, and then click "Switch to Sandbox" and click "Test Mode" like you see here (if you do not have Test Mode, then you have a newer Stripe account or didn't have webhooks used in that way.

Then, in the bottom left of the screen, click "Developers" and "Webhooks"
The difference between this and the new sandbox accounts is you'll see the orange "test mode" notice at the top of the screen.

If you want the test webhooks set up in the new sandbox account, you'll just need to re-create these in the sandbox account, and then delete the test mode webhooks
Why can't I send the Company Name field to Stripe?
When your customers purchase via an OptimizeCheckouts checkout form, we collect various information depending on the fields you enable on the checkout.
All information captured is available inside the OptimizeCheckouts “Orders’ Screen where you can see each purchase along with the customer information. On this screen you will see the company information for your customer if you collected that field on the checkout
Please be aware that company information is not passed to Stripe. Stripe does not currently include a field for company name in their system, so we’re not able to pass this through. We do pass through first name, last name, email address and relevant address information to create a customer profile in Stripe for your buyer (assuming you are using the Stripe integration).
Can I use other Stripe integrations such as iDeal or others?
At this time we only support Apple & Google Pay as well as card payments through Stripe. While there are many other payment methods available in Stripe, not all of them are compatible with the features set in the Checkouts plugin, and as such, not all of them can be added. We may look into adding more supported payment methods from Stripe in the future, however we are unable to provide a timescale for these at the moment.
How can my customers cancel their subscriptions?
To facilitate the ability for your customers to cancel their subscription, we would suggest to use the "Members Subscriptions" element. You can then choose which subscription products in the Checkouts plugin are able to be cancelled. Just follow our Member Subscriptions guide for more details.
Why does stripe.js file load on all my site’s pages?
It is normal to think that script sources shouldn't load on every page, however Stripe actually recommends this due to security and fraud prevention.
Stripe recommends this:
"Include the Stripe.js script on each page of your site—it should always be loaded directly from https://js.stripe.com, rather than included in a bundle or hosted yourself.
To best leverage Stripe’s advanced fraud functionality, include this script on every page, not just the checkout page. This allows Stripe to detect anomalous behavior that may be indicative of fraud as customers browse your website."
June 29th, 2021: Optimizations Update OptimizePress Dashboard plugin version 1.0.52
As of version 1.0.52, we have incorporated a setting to load Stripe JS file only on checkout pages. To find this setting, navigate to "OptimizePress3 > Optimizations" and on the "Assets" tab, you'll find a setting for this now as you see in the following screenshot:
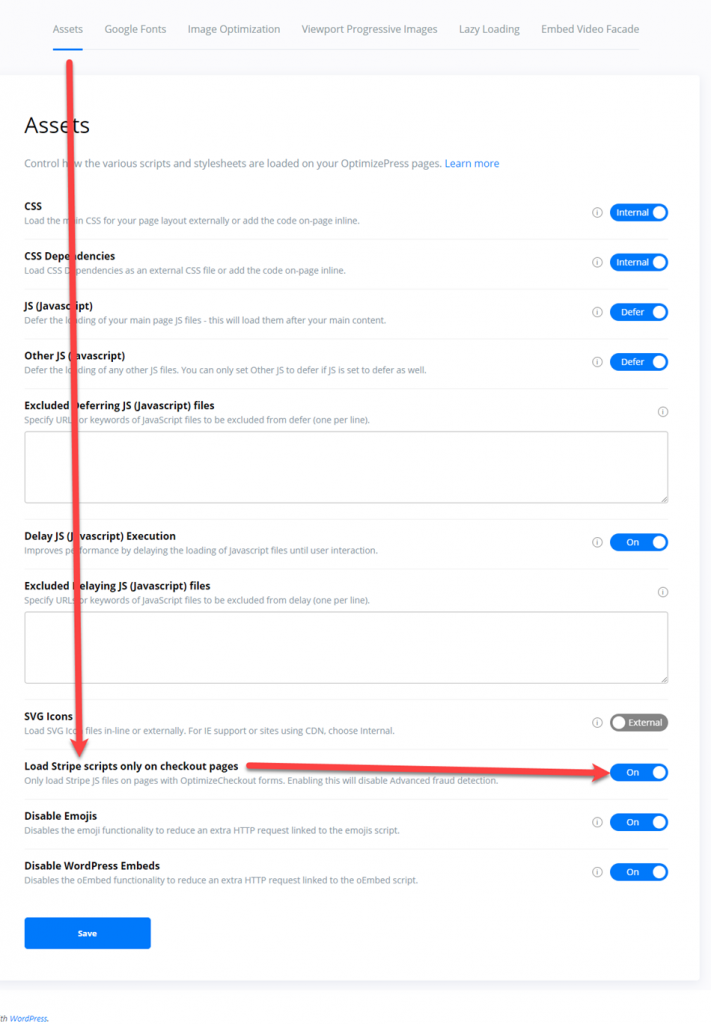
Loading Stripe JS file only on checkouts pages will disable Advanced Fraud Detection from Stripe, so you will want to consider this.
Why do I see Incomplete Payments in Stripe?
You may have noticed inside your Stripe account you sometimes see a number of payments marked as "Incomplete" inside the Payments screen when using the "All" filter. This is perfectly normal, and nothing to worry about. The reason you see this is as follows:
When using the Stripe system for processing payments, their system requires a "payment intent" to be created as soon as we know the amount being charged on the checkout form.
This payment intent initially starts as a "Incomplete" payment. This allows stripe to setup information such as tax charges and customer location.
If the visitor/buyer completes the transaction with a valid credit card, this payment intent gets confirmed and Stripe creates a charge based on it. You then see a successful payment inside your Stripe account.
If a visitor leaves your checkout without completing the checkout, or in less common occurrences where more than one payment intent is created for one customer (This can sometimes happen on upsell pages where you have multiple order buttons) - you may still see an incomplete payment logged.
This will not hurt your account, and is actually following the exact logic that Stripe requires.
Why do I not see incomplete payments for subscriptions?
Subscriptions work in a completely different way and do not use payment intents directly. Stripe internally handles every invoice (recurring charge) by creating a payment intent and attempts to charge it with a credit card on file. If it fails then it is possible that there will be failed subscription payment intents as well. If you have any questions about using Stripe please reach out to our friendly support team and they'll be happy to help further.