

The Table of Contents (TOC) Element is a vertical menu based off Headlines of your page or post. You can choose several options to customize this element such as which H tags (H1, H2, etc.) are shown in the TOC element, and whether it will show items from the full content, current row
Add the TOC Element
To add the Table of Contents element to your page, simply click the + icon and start typing in the search box there. You'll find it if you start typing "table" like I did. Just drag and drop the element into the column where you want to use it.
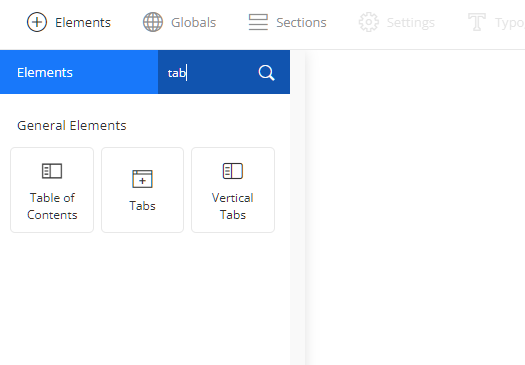
Table of Content Design Options
Once the TOC element is added to the editor, you'll see some design options.

Content Options
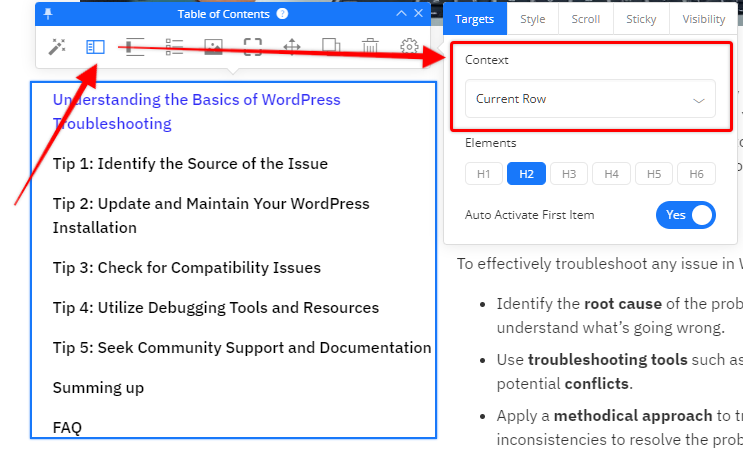
The Context is the area of the content that you want the TOC element to focus on (or target). By default, it will focus on all content. You can either select Page, Content, or Current Row.
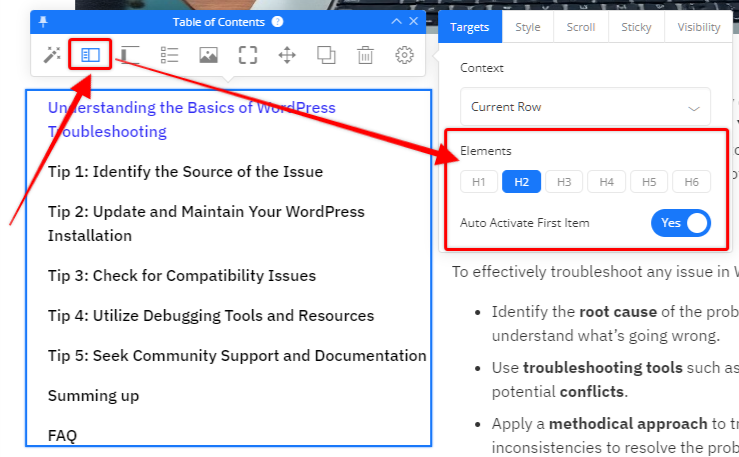
By default, the TOC element will pull the H1, H2, and H3 tags. You can change this by clicking the Table of Content Options icon (2nd icon in the toolbar), and then selecting the Elements.
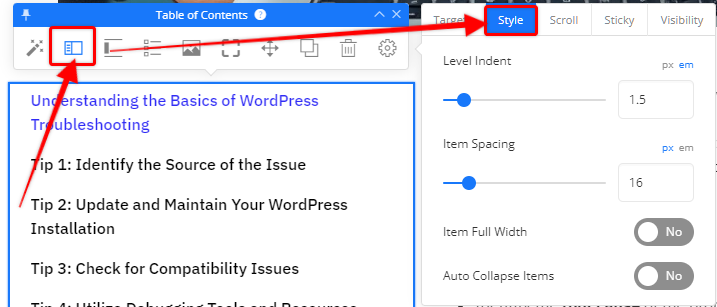
On the Style tab, you can choose options for indent, item spacing, item full width, and whether to automatically collapse items as the visitor scrolls the page.
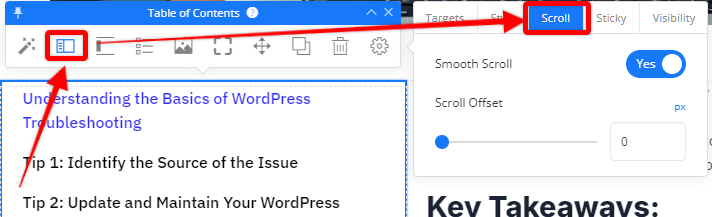
You can set up the Smooth Scroll by navigating to the Scroll tab, and turn on the Smooth Scroll setting. You'll also want to test this on your page and see if you might need to use the Scroll Offset - which can be helpful if you don't use much margin/padding on headlines, or if you have a sticky header on your page.
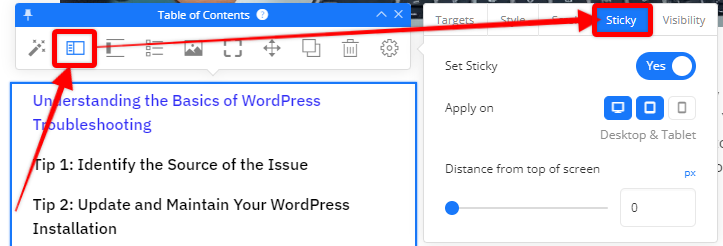
We highly recommend making the Table of Contents element "Sticky" which you can do on the next tab. Smooth scroll is turned off by default. If you turn it on, you'll see additional options for what devices to apply the sticky feature to, as well as a setting to set a distance from the top of the screen - this is helpful if you need to adjust for a floating header, or other design features on your page.
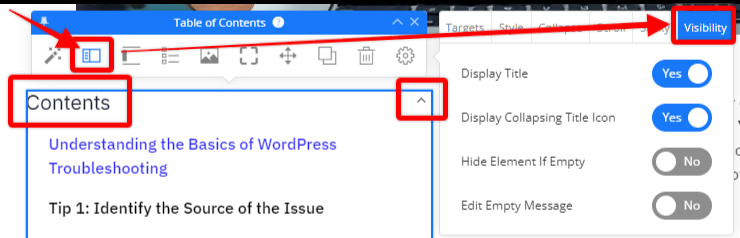
The Visibility tab will let you turn on some features, such as the title of the TOC element (editable as a headline element), Collapsing Title icon, and empty message options.
Highlight Options
If you want to highlight where someone is on the content, you can set that up on the Highlight Options settings (3rd icon on the toolbar). This feature will help the reader easily see where they are in the page by checking the TOC element as this will highlight the text and add the left border. You can use the Style, Inactive, and Active options here to fine tune additional settings for how this will behave.

Marker or Icon Settings
If you wish for the items in the Table of Contents to have an icon, or marker of some kind (such as number, image, or icon) you can set that up by clicking the Marker Options icon in the toolbar (4th icon from the left). 
Other Element Options
The rest of the icons in the Table of Contents inline toolbar are not different from other elements. You can easily set background options, borders & shadows, move the element, clone the element, and delete the element. The settings icon allows you to add spacing above/below the element, width, and alignment. Advanced options are similar to other elements as well in case you want to fine tune any settings.
If you have any other questions about the Table of Contents element, just reach out to our support team and we'll be happy to help.